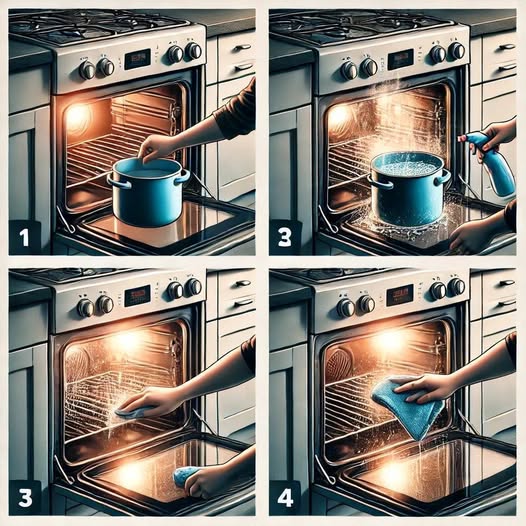
Keeping your oven clean is essential not only for maintaining its appearance but also for its efficiency. A dirty oven can affect the taste of your food and even pose safety hazards. Despite its importance, many people neglect proper oven cleaning, often opting for harsh chemical cleaners that can have detrimental effects on both health and the environment. Fortunately, there’s a simple and effective method to clean your oven that requires no toxic chemicals or tedious scrubbing. All you need are two common household items: vinegar and baking soda.
In this guide, we’ll walk you through a step-by-step process that will leave your oven looking brand new with minimal effort. No need for expensive store-bought cleaners or elbow grease. Whether your oven has built-up grease, burnt food, or stubborn grime, this eco-friendly solution is a safe and affordable way to tackle the job.
Step 1: Prepare Your Oven
Before you dive into cleaning, it’s essential to prepare your oven. Start by removing everything from inside the oven, including racks, trays, and any other cooking tools. This step not only gives you space to work but also allows you to clean each section thoroughly without obstruction.
If your oven racks are particularly dirty, you can clean them separately in the sink. Simply soak them in warm, soapy water to loosen any grease or food particles. After soaking for 20-30 minutes, scrub them with a sponge or brush and rinse them off. While the racks are soaking, you can focus on cleaning the oven itself.
Step 2: Create Your Baking Soda Paste
Now comes the magic ingredient: baking soda. This powerful natural cleaner can break down grease, grime, and food stains without the need for harsh chemicals. To create the paste, mix about 1/2 cup of baking soda with a few tablespoons of water in a bowl. You’re aiming for a thick, spreadable paste that’s easy to apply to the surfaces of the oven. Add water gradually to ensure the mixture isn’t too runny.
If you’re cleaning a particularly dirty oven, feel free to make a larger batch. The paste should have a consistency similar to toothpaste – thick enough to stay in place as you spread it over the oven surfaces.
Step 3: Apply the Paste to Your Oven
Once your baking soda paste is ready, it’s time to apply it to the oven’s interior. Using a cloth or sponge, carefully spread the paste all over the oven, focusing on the walls, bottom, and door. Make sure to cover every surface that shows signs of dirt, grease, or baked-on food. For stubborn spots, apply a thicker layer of paste and allow it to sit for a little longer.
Be sure to also apply the paste to the oven door, paying particular attention to any spots where food has spilled or splattered. The door can often collect grease and grime from splashing food, so don’t overlook this area.
Step 4: Let the Paste Sit Overnight
Once you’ve applied the baking soda paste, it’s time to let it work its magic. Allow the paste to sit for at least 12 hours – overnight is ideal. The baking soda will gradually break down the grease and grime, making it easier to wipe away the next day. The longer the paste sits, the more effective it will be in loosening any buildup.
If you have a particularly stubborn area, such as baked-on grease, you may need to reapply the paste or leave it on for a little longer. Be patient and let the natural cleaning power of the baking soda do its job. If you’re in a rush, at least 3-4 hours of sitting time will still help loosen dirt, but for the best results, overnight is optimal.
Step 5: Wipe Down the Oven
After letting the paste sit, it’s time to begin cleaning. Take a damp cloth or sponge and begin wiping away the baking soda paste. You may find that some areas require a bit of scrubbing, especially where the grime has been more stubborn. For those spots, use a little more elbow grease or a soft scrub brush to help lift the dirt.
As you wipe away the paste, you should see the grime and grease coming off easily, leaving the oven looking much cleaner. You can rinse your cloth or sponge frequently to remove the accumulated dirt. Once you’ve wiped off all the baking soda paste, you’ll notice a significant improvement in the appearance of your oven.
Step 6: Use Vinegar for the Final Clean
Now that the bulk of the grime has been wiped away, it’s time to use vinegar to finish off the cleaning process. Vinegar is another natural powerhouse when it comes to cleaning, and it pairs beautifully with baking soda. The two ingredients react together, creating a fizzy foam that helps lift off the last bits of grime.
Fill a spray bottle with white vinegar and lightly spray it over the surfaces of your oven where there is still baking soda residue. As you spray the vinegar, you’ll notice a fizzy, foaming reaction. This is the vinegar reacting with the baking soda, loosening any remaining dirt and grime.
Use a clean cloth to wipe away the foam and any leftover residue. The vinegar will neutralize any lingering baking soda, leaving your oven sparkling clean and free from any unpleasant smells.
Step 7: Rinse and Dry
Once you’ve removed all of the baking soda and vinegar residue, give your oven one final wipe with a damp cloth to ensure that no cleaner remains. Make sure to wipe down all the surfaces thoroughly to remove any moisture or residue from the vinegar.
After rinsing, dry the oven with a clean, dry cloth to remove any remaining dampness. This will help prevent any streaks and leave your oven looking polished and brand new.
Step 8: Final Heating
For a final touch, you can give your oven a quick burst of heat. Preheat the oven to a low temperature – about 250°F (120°C) – and leave it on for 10-15 minutes. This step will help “burn off” any remaining moisture and ensure the oven is completely dry and ready for use. It also helps to eliminate any lingering vinegar smell.
Why Use This Method?
Using natural ingredients like baking soda and vinegar offers several benefits over commercial oven cleaners:
- Non-toxic and Safe: Unlike many chemical cleaners, baking soda and vinegar are non-toxic, making them safe for use around your family and pets. You don’t need to worry about inhaling harmful fumes or accidentally coming into contact with harsh chemicals.
- Eco-friendly: Baking soda and vinegar are both environmentally friendly and biodegradable. They don’t contribute to pollution, and you don’t have to dispose of harmful chemical products.
- Cost-effective: These common household ingredients are inexpensive compared to the cost of specialized oven cleaners. You can clean your oven effectively without breaking the bank.
- No Harsh Scrubbing: This method eliminates the need for aggressive scrubbing, which can damage your oven’s surfaces. The natural ingredients work to break down grime and grease, making it easy to wipe away.
- Gentle on Surfaces: Unlike many commercial cleaners that can be abrasive or corrosive, vinegar and baking soda are gentle on your oven’s interior surfaces, including the door, walls, and heating elements.
Conclusion
Cleaning your oven doesn’t have to be a chore that requires hours of hard work or exposure to harsh chemicals. With just two simple ingredients – baking soda and vinegar – you can tackle even the dirtiest ovens and leave them looking like new. This method is safe, effective, and easy to do, making it the perfect choice for anyone looking to keep their oven sparkling clean without the hassle.
So next time your oven starts to look a little grimy, skip the chemical cleaners and reach for some baking soda and vinegar instead. Your oven will thank you, and so will your health and the environment. Happy cleaning!


