The first step in creating your homemade banana peel fertilizer is preparing the banana peels themselves. Start by gathering 2–3 banana peels. These can be from fresh bananas or even slightly dried peels that you have saved up over time. Dried peels work just as well, though fresh peels will release their nutrients faster.
Next, rinse the banana peels under water to remove any dirt or potential pesticide residue. It’s a good idea to wash them thoroughly if you didn’t grow the bananas yourself or if you’re unsure about any chemical residues.
Once the peels are clean, use a knife or scissors to cut them into smaller pieces. Aim for 1–2 inch pieces. This increases the surface area and allows the nutrients to be extracted more efficiently during the soaking process.
Step 2: Place the Peels in a Container
After cutting the peels, place them in a container. A glass jar or plastic container with a lid works best, as the lid will help seal the container and prevent contamination or odor. The container should be large enough to comfortably hold the peels and enough water to submerge them.
It’s essential to use a container that allows for easy stirring or shaking. The larger the container, the more room you’ll have for the peels to move around, which promotes even nutrient extraction. Make sure the container is food-safe, as it will be in contact with the water used for your plants.
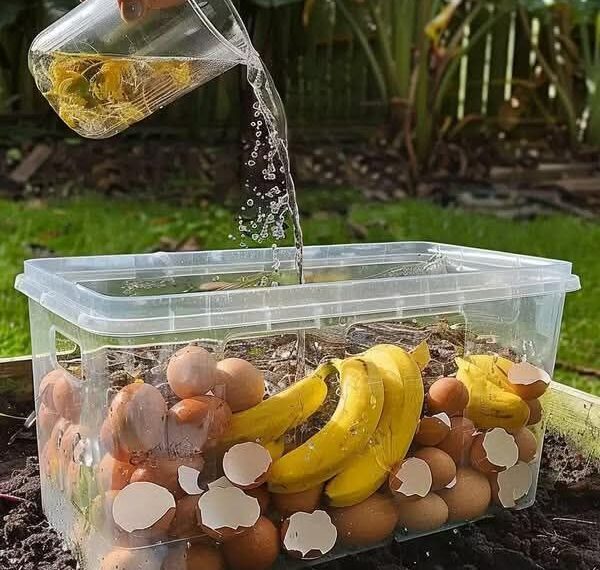
Step 3: Add Water
Once the banana peels are in the container, add 1 liter of water. You can use tap water or filtered water, depending on your preference and the quality of the water in your area. The water should be enough to cover the peels completely to allow the nutrients to leach out into the solution.
At this point, you can also experiment with the type of water used. Some gardeners prefer to use rainwater, which is often softer and free from the chemicals found in tap water, such as chlorine and fluoride. Using filtered water is a great option, as it will provide a cleaner, more neutral base for nutrient extraction.
Step 4: Soak the Peels
Now that you have your peels submerged in water, it’s time to seal the container and allow it to soak. Place the lid on the container and let the banana peels sit for 24 to 48 hours at room temperature. This soaking period is crucial for extracting the maximum amount of nutrients from the peels into the water.
During the soaking process, the nutrients within the banana peels—such as potassium, phosphorus, magnesium, and calcium—will dissolve into the water, creating a liquid solution. You can shake or stir the container occasionally to ensure that the peels are properly agitated and that all the nutrients are extracted evenly. Shaking or stirring once or twice a day will help the nutrients break down more efficiently.
If you want to accelerate the process, you can let the container sit in a warm area, but avoid exposing it to direct sunlight, which could cause the water to heat up too much.
Step 5: Strain the Mixture
After 24–48 hours, your banana peel soak is ready to be strained. Use a fine mesh strainer to separate the liquid fertilizer from the banana peel remnants. The liquid you’re left with is rich in nutrients, ready to give your plants a natural boost.
Transfer the strained liquid to a watering can or spray bottle for easy application. The leftover banana peels, while now nutrient-depleted, can be composted or buried in your garden to continue contributing nutrients in a slower, more long-term way. If you choose to compost, the peels will break down over time and enrich your soil naturally.
How to Use Banana Peel Soak Fertilizer
Now that you’ve made your homemade fertilizer, it’s time to apply it to your plants. There are two main ways to use banana peel soak fertilizer: soil application and foliar spray.
Soil Application
For soil application, simply pour the liquid fertilizer around the base of your plants. For smaller plants, you can use about 1 cup of the liquid, while larger plants may require 2–3 cups, depending on their size and the amount of water they typically need. Be sure to water your plants afterward, as this will help the fertilizer penetrate the soil and be absorbed by the plant roots.
You can use this fertilizer every 1–2 weeks for optimal results. It’s especially useful for flowering and fruiting plants, as the potassium in the banana peel soak promotes flower and fruit development. Additionally, the phosphorus and calcium in the mixture support root health and overall plant structure.
Foliar Spray
If you prefer to use a foliar spray, simply transfer the banana peel fertilizer into a spray bottle. Mist your plants’ leaves with the solution, making sure to cover both the top and bottom of the leaves. This method allows the plants to absorb nutrients directly through the leaf surface, which is particularly effective for plants with nutrient deficiencies.
Foliar feeding is also ideal for houseplants that are in containers, as it avoids potential nutrient buildup in the soil. Just be sure to avoid spraying your plants during the hottest part of the day, as the solution could cause leaf burn when the sun hits the wet leaves.
Additional Tips and Benefits
- Use with other natural fertilizers: While banana peel soak fertilizer is rich in potassium and other nutrients, combining it with other organic fertilizers, like compost tea or fish emulsion, can provide a broader spectrum of nutrients for your plants.
- Peel concentration: If you want a more concentrated fertilizer, simply increase the number of banana peels you use. The more peels you add, the more potent the solution will be. However, don’t go overboard—too much potassium can sometimes cause an imbalance in other nutrients.
- Patience is key: Unlike chemical fertilizers, banana peel soak fertilizer works more slowly and naturally. You won’t see instant results, but with regular use, your plants will become healthier and more robust over time.
- Nutrient benefits: Potassium is particularly important for strong plant growth, disease resistance, and drought tolerance. Phosphorus aids in root development and blooming, while calcium helps with cell structure and disease prevention.
Conclusion
Transforming banana peels into homemade fertilizer is a simple and eco-friendly way to nourish your plants and reduce waste. Whether you’re growing a vegetable garden or nurturing houseplants, banana peel fertilizer can provide a natural boost to your plants, helping them thrive in a healthy, sustainable way. By following the five easy steps outlined above, you can create an effective, low-cost fertilizer that’s as good for the environment as it is for your plants. Try it today, and watch your garden flourish!