Homemade cheese is a fantastic way to enjoy fresh, creamy cheese without the hassle of complicated processes. This recipe is simple, using just two basic ingredients — milk and vinegar — to create a fresh, mild cheese that can be used in a variety of dishes. The process of making cheese from scratch allows you to control the texture, flavor, and richness of the cheese. It’s a fun, rewarding experience that can be enjoyed by beginners and seasoned cooks alike.
Making your own cheese at home doesn’t require special equipment or hard-to-find ingredients. All you need is milk, vinegar, a bit of salt, and some patience. This recipe is ideal for those who love to cook from scratch and appreciate the satisfaction of preparing food from the ground up.
Ingredients
- 1.5 liters of milk (6 1/3 cups) – Whole milk is recommended for a creamier, richer cheese, but you can also use skim or 2% milk if you prefer a lighter cheese.
- 2 tablespoons apple cider vinegar (or white vinegar) – The acid in vinegar is what causes the milk to curdle and separate into curds and whey.
- Salt, to taste – Salt enhances the flavor of the cheese and helps to preserve it.
- Optional: 50 grams of melted butter (1/4 cup) – This adds a bit of richness and creaminess to the cheese.
- Optional: 1 tablespoon of Provencal herbs – This is for flavoring the cheese if you want to add a fragrant, herbal touch. You can also experiment with other seasonings like garlic powder, crushed black pepper, or paprika.
Instructions
1. Prepare the Milk
Start by pouring the milk into a large, heavy-bottomed pot. The heavy bottom is important because it helps distribute the heat evenly and prevents the milk from burning. Heat the milk over medium heat, stirring occasionally to prevent it from scorching or sticking to the bottom of the pot.
Keep an eye on the milk as it heats. You want to bring it just below boiling — around 190°F or 88°C. The first signs of this are small bubbles forming along the edges of the milk. You don’t need to boil the milk completely; just get it hot enough to facilitate curdling. This step is crucial because milk that is too hot may scorch, while milk that is not hot enough may not curdle properly.
2. Curding the Milk
Once the milk has reached the right temperature, remove the pot from the heat. Add the vinegar — you can use apple cider vinegar or white vinegar. Stir the vinegar gently into the milk. You’ll soon see the milk start to curdle as it separates into curds (the solid part) and whey (the liquid part). The curds will appear as small clumps, while the whey will become a clear, pale yellow liquid.
Let the mixture sit for about 5 to 10 minutes. This ensures that the milk completely separates, and the curds form fully. Don’t rush this step; the longer you let the milk sit, the more fully the curds will develop.
3. Strain the Curds
After the milk has fully curdled, it’s time to strain the curds and whey. Line a colander with cheesecloth or a clean kitchen towel, and place it over a bowl or sink. Carefully pour the curdled milk mixture into the colander. The curds will collect in the cheesecloth, and the whey will drain away.
Gently press on the curds with the back of a spoon to help squeeze out any excess whey. Be careful not to press too hard, as this may cause the curds to become too dry. If you like a creamier cheese, you can leave a bit of whey in the curds; for a drier texture, press out as much as possible.
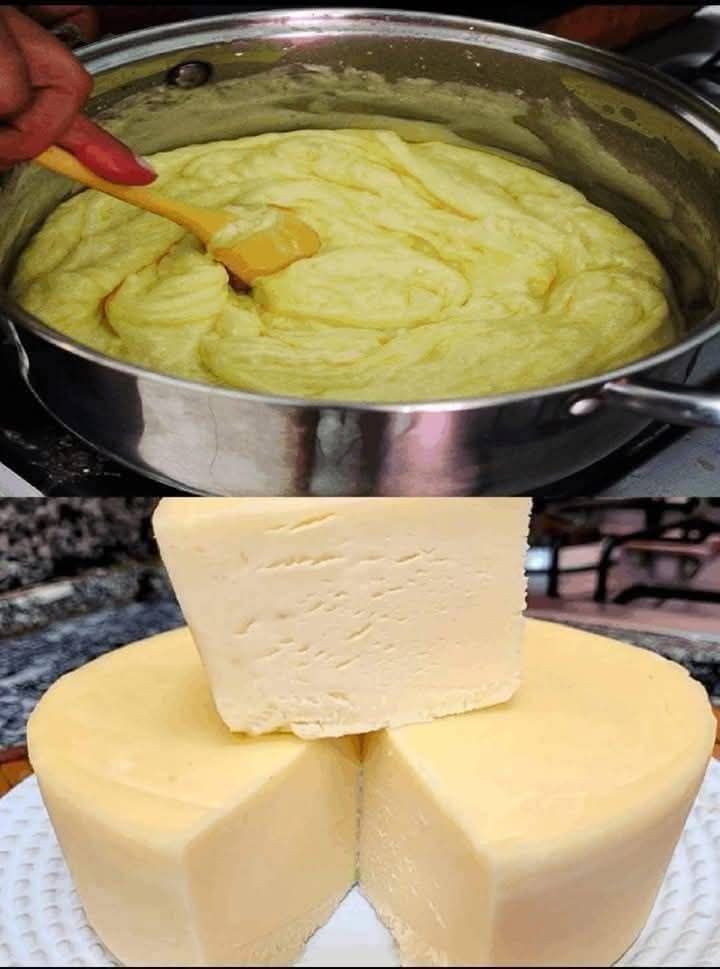
4. Season and Shape the Cheese
Now that the curds have been drained, it’s time to season your cheese. Sprinkle salt to taste, and if you prefer, add some melted butter and Provencal herbs for extra flavor. The butter will help give the cheese a creamy richness, while the herbs will infuse the cheese with aromatic notes. Mix the curds and seasoning together thoroughly.
At this point, you can decide how you want to shape your cheese. If you want a block of cheese, simply mold the curds into a small block or ball. If you prefer crumbled cheese, just break the curds into small pieces.
5. Set and Serve
After you’ve shaped your cheese, place it in the refrigerator to chill for at least an hour. This allows the cheese to firm up and set. The cheese will be easier to slice or crumble once it’s been chilled.
Serve your homemade cheese as a spread on bread, in salads, or as a topping for pasta or roasted vegetables. You can also use it in various baked dishes, or simply enjoy it on its own as a snack.
Tips for Success
- Milk Selection: Whole milk will yield the creamiest cheese, but if you prefer a lighter cheese, you can use lower-fat milk. Keep in mind that the texture and richness may vary depending on the milk you choose.
- Vinegar Options: Both apple cider vinegar and white vinegar work well in this recipe. Apple cider vinegar may add a slight tangy flavor, while white vinegar has a more neutral taste.
- Herbs and Seasonings: Experiment with different herbs and spices to personalize your cheese. Fresh herbs like basil, oregano, or thyme can give the cheese a unique flavor profile. You can also add a pinch of garlic powder or onion powder for extra depth.
- Storage: Store your homemade cheese in an airtight container in the refrigerator for up to 3-4 days. If you want to keep it longer, consider freezing the cheese, though the texture may change slightly after freezing.
- Whey Uses: Don’t throw away the leftover whey! It’s full of nutrients and can be used in smoothies, soups, or baking as a substitute for water or milk.
Benefits of Homemade Cheese
Making cheese at home is not only a fun and rewarding experience but also a great way to control what goes into your food. By using natural ingredients and avoiding preservatives or artificial additives, you can enjoy a fresher, healthier product. Here are some benefits of homemade cheese:
- Customization: You can adjust the flavor and texture of the cheese to suit your preferences. Add more herbs, spices, or even hot sauce for a more unique taste.
- Freshness: Homemade cheese is fresher than store-bought varieties, and you can enjoy it right after making it.
- Lower Cost: Making cheese at home is cost-effective, especially when you compare it to the price of high-quality cheeses at the store. A few liters of milk can yield a generous amount of cheese.
- Less Waste: By making your own cheese, you reduce packaging waste associated with store-bought products.
- Nutritional Control: You can control the amount of salt, fat, and other ingredients in your cheese, making it a healthier option compared to commercial varieties that often contain preservatives and additives.
Conclusion
Homemade cheese with milk and vinegar is an easy, satisfying project that produces a creamy, flavorful cheese with minimal effort. By following the simple steps of curdling milk, straining the curds, and seasoning the cheese, you can enjoy a delicious homemade cheese that’s perfect for a variety of uses. Whether you enjoy it as a spread, topping, or snack, this simple cheese recipe is sure to become a staple in your kitchen.
Enjoy experimenting with different flavors and textures, and most importantly, have fun making your own cheese at home!