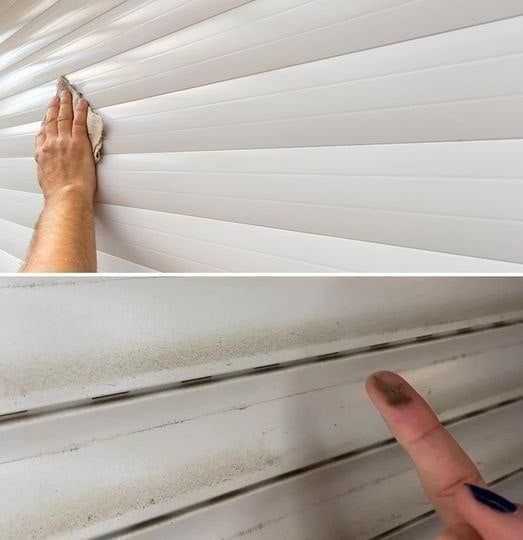
Blinds are a popular choice for window coverings in many homes. They provide privacy, control over natural light, and add a stylish touch to any room. However, they also tend to accumulate dust, grime, and allergens, making regular cleaning essential. If neglected, dirty blinds can diminish the aesthetic appeal of your interior and impact indoor air quality. Cleaning blinds can feel like a daunting task, often involving awkward positions and piles of dust. Fear not! In this article, we’ll explore the fastest and most effective method to clean your blinds without a mess and hassle. Whether your blinds are made of wood, vinyl, aluminum, or fabric, this guide will help you achieve a spotless finish in no time.
Why Clean Your Blinds?
Before we dive into the cleaning methodologies, it’s vital to understand the importance of keeping your blinds clean:
- Allergen Reduction: Dust mites, pollen, and pet dander can accumulate on blinds, contributing to allergies.
- Aesthetic Appeal: Clean blinds enhance the overall appearance of your home, making rooms look polished and well-cared for.
- Prolonged Lifespan: Regular cleaning helps maintain the materials and mechanisms of blinds, extending their lifespan.
- Improved Air Quality: Dust and dirt can circulate through the air, impacting the quality of your indoor environment.
With these benefits in mind, let’s get started with the fastest and most effective cleaning method.
Preparation: Gather Your Supplies
To streamline the cleaning process, gather the following supplies before you begin:
- Dusting Tool: An electrostatic duster or microfiber cloth is ideal for capturing dust without spreading it around.
- Cleaning Solution: A gentle all-purpose cleaner or a mix of vinegar and water work well for various materials.
- Bucket: To hold your cleaning solution.
- Old Towels or Rags: For drying and additional cleaning.
- Step Ladder: If you have high blinds, this will help you reach the tops comfortably.
- Protective Gloves: Optional but useful for protecting your hands, especially when using chemical solutions.
Step-by-Step Cleaning Method
Step 1: Dusting the Blinds
- Start at the Top: Begin dusting at the top of the blinds and work your way down. This prevents dust from settling on already cleaned sections.
- Use the Right Technique: If using an electrostatic duster, slide it down the slats to pick up dust effectively. For a microfiber cloth, wrap it around two fingers for better grip and easy maneuvering. Wipe each slat individually, ensuring that you’re picking up, rather than pushing around, the dust.
- Opt for a Vacuum: If your blinds are particularly dusty, using a vacuum with a brush attachment can help eliminate significant debris quickly. However, make sure to use a low suction setting to avoid damaging the blinds.
Step 2: Preparing the Cleaning Solution
Once you’ve dusted the blinds thoroughly, prepare your cleaning solution:
- Mix Your Solution: Combine equal parts of vinegar and warm water in your bucket for a natural cleaner. For traditional all-purpose cleaners, follow the manufacturer’s dilution instructions.
- Test for Colorfastness: If you’re cleaning fabric blinds, spray a small amount of your solution on an inconspicuous area to check for colorfastness. If the fabric shows no discoloration, proceed with cleaning.
Step 3: Deep Cleaning the Blinds
- Wipe Down the Slats: Dip a soft cloth or sponge into the cleaning solution and wring it out so it’s damp but not dripping. Gently wipe each slat from top to bottom. Avoid soaking the blinds; excess moisture can lead to mold or damage.
- Address Stubborn Stains: If you encounter stubborn spots or stains, apply a small amount of your cleaning solution directly to the stained area and let it sit for a minute. Then, gently scrub with your cloth.
- Rinse (if necessary): For wooden blinds, you might prefer to use a cleaner specifically designed for wood, which often doesn’t require rinsing. For other materials, if you feel the need to remove residues from the all-purpose cleaner or vinegar mix, use a damp cloth with plain water for an additional wipe-down.
Step 4: Drying the Blinds
- Air Dry or Wipe Down: Allow the blinds to air dry if possible. If you’re in a hurry or unsure about excess moisture, opt to gently dry the slats with a clean, dry microfiber cloth.
- Avoid Direct Sunlight: If you can, do not place the blinds in direct sunlight to dry, as this may warp or fade some materials.
Step 5: Finishing Touches
- Polish Wooden Blinds: If you have wooden blinds, consider applying a wood polish after they have dried to maintain luster and protect the wood from dust build-up.
- Check for Missed Spots: Once everything is dry, take a moment to inspect your work. Touch up any areas where dirt or dust might still linger.
- Regular Maintenance: Try to dust your blinds once every couple of weeks, alternating between this thorough cleaning method and a quick dusting to keep buildup at bay.
Alternative Method: Using a Blinds Cleaning Tool
If you’re looking for an even faster cleaning process, consider investing in a specialized blinds cleaning tool. These tools usually consist of two microfiber pads that attach to a handle, allowing you to clean multiple slats at once. Here are a few benefits of using such tools:
- Speed: They reduce cleaning time significantly by enabling you to clean several slats at once.
- Ease of Use: Most tools are designed to reach awkward spaces, making the job less physically demanding.
- Effective Dust Capture: The microfiber material is excellent for trapping dust without spreading it.
Conclusion
Cleaning blinds doesn’t need to be a time-consuming or messy chore. With the right preparation and methods, you can maintain the cleanliness of your blinds and enjoy a dust-free environment. By following the step-by-step guide outlined in this article, you can ensure your blinds remain a stylish and functional part of your home without becoming a dust magnet. Remember to keep your supplies handy, practice consistent maintenance, and don’t hesitate to invest in specialized cleaning tools for added efficiency. Your home will thank you for your efforts by radiating cleanliness and fostering a healthier atmosphere. Happy cleaning!


