Making homemade cheese might seem like a daunting task, but with the right ingredients and a little patience, it can be a fun and rewarding experience. All you need to get started are three simple ingredients: milk, yogurt, and lemon. By following this simple recipe, you’ll be able to create a creamy, soft cheese that is perfect for use in everything from salads to sandwiches, or even as a snack on its own. And the best part? You don’t need any fancy equipment or advanced techniques to make it!
In this guide, we’ll walk you through the process of making the best homemade cheese from scratch, using just 1 liter of whole milk, 1 cup of sugar-free natural yogurt, and half a lemon. We’ll also cover the additional steps for seasoning the cheese and some helpful tips to ensure you end up with the creamiest, freshest cheese possible.
Why Make Homemade Cheese?
There are several reasons why making homemade cheese is a fantastic idea:
- Control Over Ingredients: Making your own cheese gives you full control over the ingredients. You can use the best quality milk and yogurt, ensuring that your cheese is free from any unwanted additives or preservatives. This is especially important if you’re trying to avoid processed foods.
- No Added Sugars: This homemade cheese recipe uses sugar-free yogurt, making it a much healthier alternative to store-bought cheeses that often contain added sugars or artificial flavors. This way, you can ensure that your cheese is natural, healthy, and delicious.
- Freshness: There is nothing quite like fresh, homemade cheese. It will have a richer, creamier flavor than store-bought cheese and can be used in a wide range of dishes.
- Cost-Effective: Homemade cheese can save you money, especially if you’re a fan of high-quality cheeses. This simple recipe doesn’t require expensive equipment or complex ingredients, yet it yields a beautiful homemade product.
- Fun and Therapeutic: Making cheese at home can be a fun and relaxing process. It allows you to connect with the food you eat and gives you a deeper appreciation for the craft of cheesemaking.
Now that we’ve covered the benefits, let’s jump right into the recipe!
Ingredients for Homemade Cheese
To make the best homemade cheese, you will need the following ingredients:
- 1 liter of whole milk – Whole milk is preferred because it provides the creaminess and richness that is ideal for making cheese. You can use fresh milk from a local farm if possible for the best results, but store-bought whole milk will work as well.
- 1 cup of sugar-free natural yogurt – The yogurt acts as a starter culture, helping to curdle the milk and create the soft, creamy texture of the cheese. Make sure that the yogurt you use is natural and free of added sugar or artificial flavorings.
- 1/2 lemon – The lemon juice will help coagulate the milk and further encourage the curdling process. The acidity from the lemon is essential for the transformation of the milk into cheese.
- Salt to taste – Adding a bit of salt enhances the flavor of the cheese and brings out its natural richness. You can adjust the amount based on your personal taste.
Tools You’ll Need
Before you start, gather the following tools and equipment to ensure a smooth cheesemaking process:
- Cotton towel – This will be used for straining the cheese and allowing excess liquid (whey) to drain away.
- Small saucepan – The saucepan is where you’ll heat the milk and combine it with the other ingredients.
- Sieve – A fine-mesh sieve will help you strain the cheese, separating the curds (solid part) from the whey (liquid part).
- Large bowl – You’ll need a bowl to catch the whey after straining the curds. This will help you separate the liquid and solid parts efficiently.
- Wooden spoon or spatula – To gently stir the milk as it heats and curdles, helping to avoid burning or uneven heating.
Step-by-Step Instructions for Making Homemade Cheese
Step 1: Heat the Milk
Start by pouring the 1 liter of whole milk into your small saucepan. Place the saucepan over medium heat and gently warm the milk. Stir it occasionally to ensure that the milk does not burn on the bottom. You want the milk to heat up gradually, not to boil, as this can affect the texture of your cheese.
Once the milk reaches about 85°C (185°F), it should be steaming, but not boiling. You can check the temperature using a kitchen thermometer or by simply watching for signs that the milk is close to the boiling point, such as small bubbles forming around the edges.
Step 2: Add the Yogurt and Lemon Juice
Once the milk is heated to the proper temperature, it’s time to add the yogurt and lemon juice. Stir in the 1 cup of sugar-free natural yogurt and the juice of half a lemon. Mix everything together gently but thoroughly with your wooden spoon.
As the yogurt and lemon juice combine with the hot milk, the milk will start to curdle. This is the magic moment when your cheese is beginning to form. The acid in the lemon helps the proteins in the milk (casein) bind together, forming curds.
Step 3: Let the Milk Sit and Curds Form
After stirring the yogurt and lemon juice into the milk, remove the saucepan from the heat. Let the mixture sit undisturbed for about 30-45 minutes. During this time, the curds will separate from the whey, forming a thick, creamy texture at the top of the milk. You’ll notice the curds (solid parts) separating from the whey (the watery liquid).
The longer the mixture sits, the firmer the curds will become. However, be careful not to let it sit for too long, as this can lead to overly firm cheese. After about 45 minutes, the curds should be soft and the whey should be a pale yellowish color.
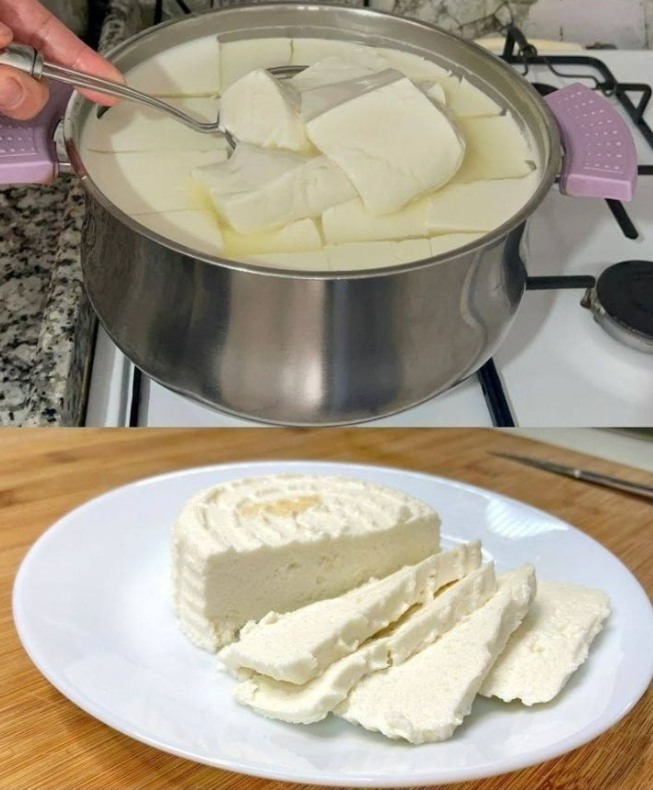
Step 4: Strain the Curds and Whey
Once the curds have formed, it’s time to separate them from the whey. Take your fine-mesh sieve and place it over a large bowl. Line the sieve with a cotton towel or cheesecloth. Pour the curdled milk mixture into the sieve, allowing the whey to drain into the bowl below. This may take several minutes.
As the liquid drains out, the curds will remain in the towel or cheesecloth. Gently press down on the curds with a spoon to help release more whey. You can save the whey for other uses, such as adding it to smoothies or using it as a base for soup or breadmaking.
Step 5: Salt the Cheese
After most of the whey has been drained, transfer the curds into a clean bowl. Add salt to taste. A pinch of salt is usually enough, but you can adjust the amount depending on your preference. Mix the salt into the curds gently, ensuring an even distribution.
Step 6: Shape the Cheese
At this point, your homemade cheese is ready to be shaped. If you want a firmer cheese, you can press the curds in the towel or cheesecloth to remove excess moisture. If you prefer a softer, creamier cheese, you can leave it as-is.
To shape the cheese, simply fold the towel or cheesecloth around the curds and form it into a compact shape. You can mold it into a ball or a block, depending on your preference.
Step 7: Let the Cheese Rest
Once your cheese has been shaped, let it rest for another 2-3 hours to allow the flavors to develop. During this time, the cheese will firm up slightly, but it will still maintain a soft, spreadable texture.
Step 8: Enjoy Your Homemade Cheese
Your homemade cheese is now ready to enjoy! It can be used in a variety of dishes, from spreading on crackers or bread to adding to salads and sandwiches. You can also store it in the refrigerator for up to 5 days, wrapped in parchment paper or in an airtight container. Just be sure to keep it covered to prevent it from drying out.
Creative Ways to Use Your Homemade Cheese
Now that you have a batch of delicious homemade cheese, here are some ideas for how to use it in your cooking:
- Spread on Toast or Crackers: Spread the cheese on a piece of toasted bread or a cracker for a quick, delicious snack.
- Salads: Crumble the cheese over a fresh salad for added creaminess and flavor.
- Sandwiches: Use the cheese in sandwiches for a fresh, creamy filling. It pairs especially well with fresh herbs, lettuce, and tomato.
- Pasta: Use the cheese in pasta dishes, either stirred into the sauce or sprinkled over the top for added richness.
- Baking: Use the cheese as a filling for savory pastries, turnovers, or empanadas.
Conclusion
Making homemade cheese doesn’t have to be intimidating. With just three simple ingredients — milk, yogurt, and lemon — you can create a fresh, creamy cheese that’s perfect for a variety of dishes. The process is straightforward, and with a little patience, you can enjoy the rewards of your hard work in just a few hours.
Whether you’re using it in a recipe, spreading it on bread, or simply enjoying it on its own, homemade cheese is a delightful treat. The best part is, once you’ve mastered this simple recipe, you’ll be able to create cheese at home anytime you want, without needing any fancy equipment or expensive ingredients. So, gather your ingredients, and start making your own delicious homemade cheese today!