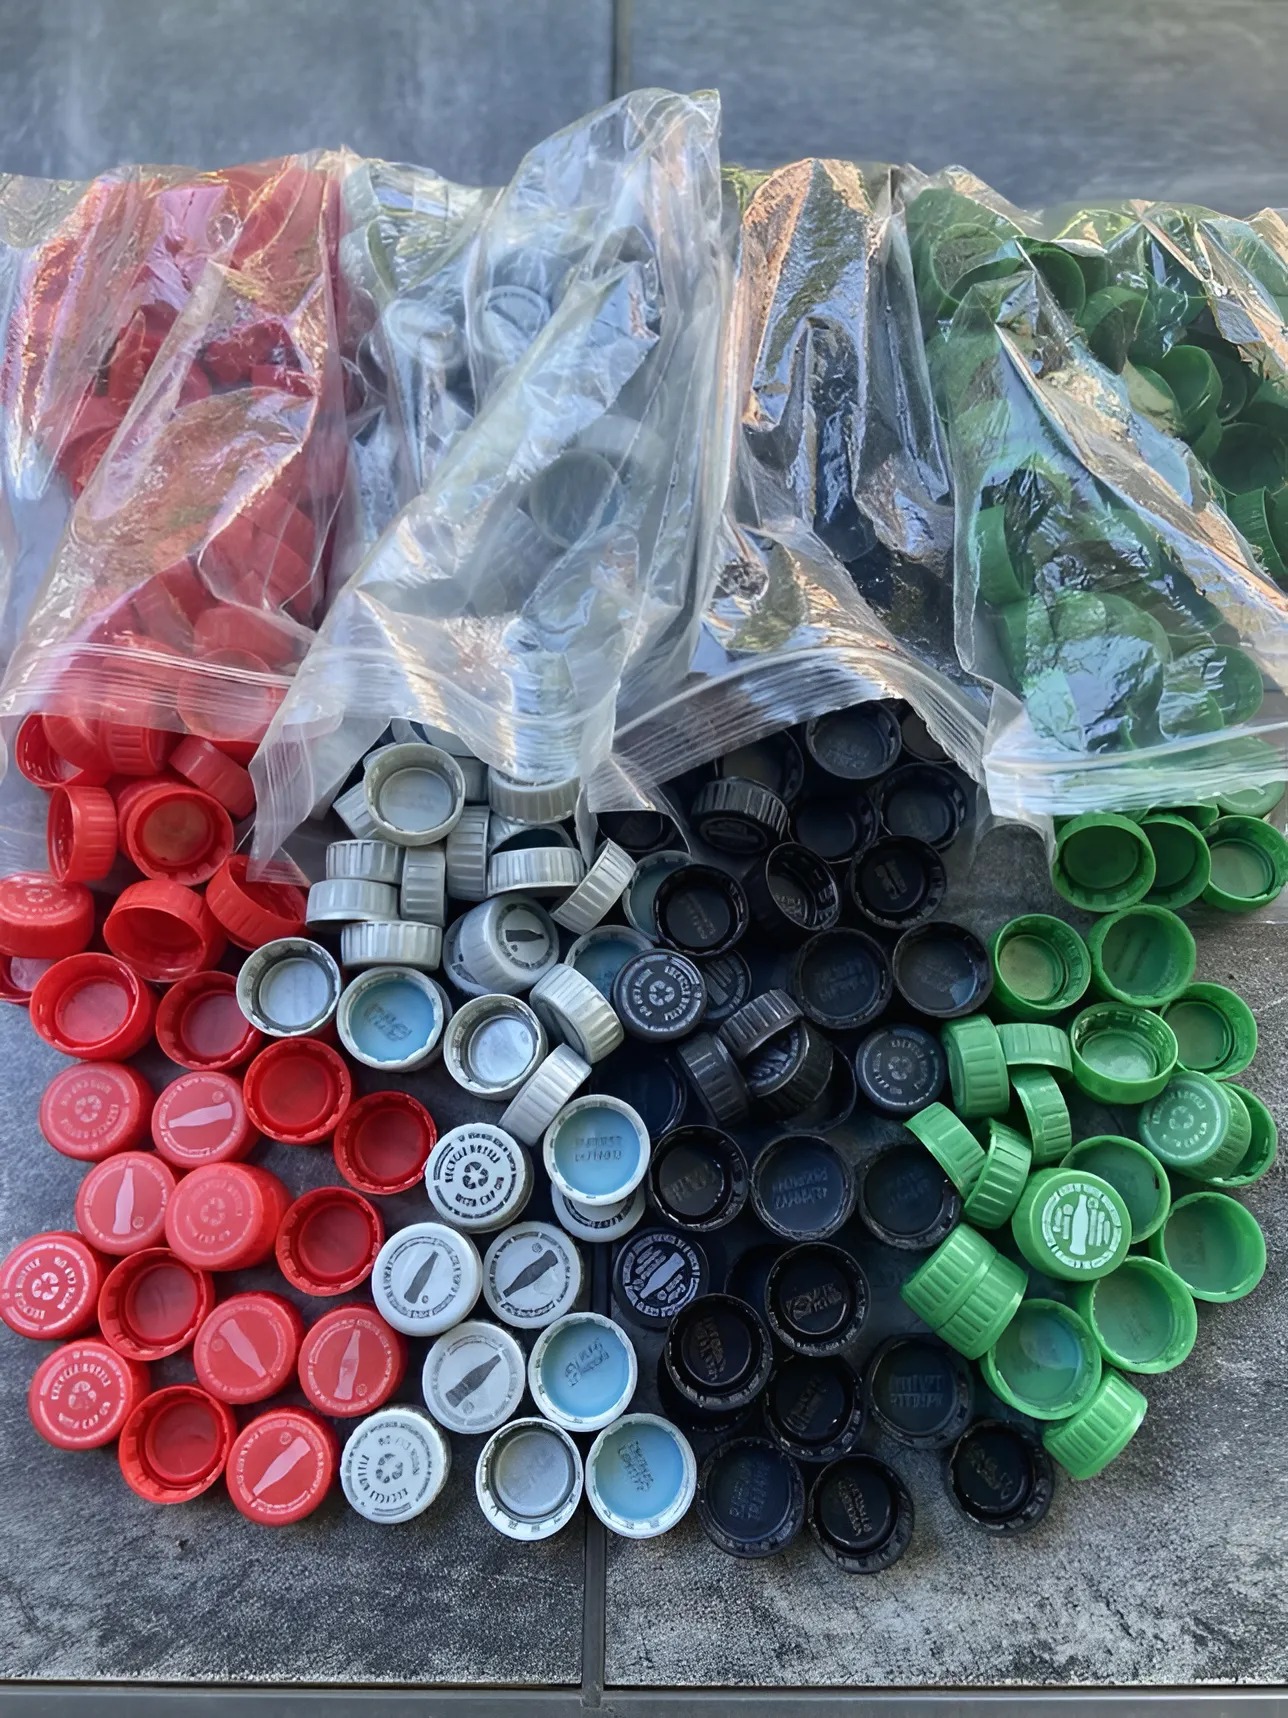
At first, I used to tease my sister for collecting plastic bottle caps. Why keep them when they usually end up in the trash or the recycling bin? But when I saw what she had made with them, I was impressed. A simple pile of bottle caps had been transformed into a colorful, practical basket perfect for organizing! Intrigued, I decided to try it myself. And what if you gave it a try too? Recycling plastic caps can be more than just a way to reduce waste—it can also lead to creative, functional projects that bring a unique touch to your home.
Why Recycle Plastic Bottle Caps?
Plastic bottle caps are often overlooked, thrown away without a second thought. However, these small items can be reused in countless ways! Not only does recycling them reduce plastic waste, but their durability and variety of colors make them perfect for creative projects. Making a basket out of bottle caps is a wonderful way to combine eco-friendliness with creativity, resulting in a unique and practical item for your home.
Here are some of the reasons why you should consider recycling plastic caps:
- Environmental Benefits: By reusing plastic caps, you are directly contributing to reducing plastic waste. Recycling plastic helps decrease pollution and the environmental impact associated with producing new plastic products.
- Creative Potential: Plastic bottle caps come in all sorts of colors, which opens up endless possibilities for artistic and decorative projects. Whether you’re crafting a colorful basket, creating a wall hanging, or making coasters, these caps can transform into almost anything you can imagine.
- Cost-Effective: Recycling plastic caps at home means you don’t need to purchase expensive materials for your DIY projects. You can make beautiful and useful items without spending much money at all.
- Engagement in Sustainability: By incorporating recycling into your routine, you become more conscious of your environmental impact. This hands-on approach can be a great way to teach children the importance of sustainability while engaging them in creative activities.
- Functional and Decorative: Items made from recycled plastic caps, like baskets or trays, are not only eco-friendly but also highly practical. Whether you’re organizing small items around your home or creating a one-of-a-kind decoration, recycled plastic can be surprisingly functional.
Now that we know the benefits, let’s get started on your project of creating a beautiful and functional basket from plastic bottle caps!
Materials Needed for Making a Bottle Cap Basket
Before you dive into your crafting project, here’s a list of everything you’ll need:
- Plastic Bottle Caps: It’s best to use caps of similar colors for a uniform look, though you can mix and match colors for a more striking, contrasting effect. Think about the visual impact you want to create—combining vibrant hues like red and blue or going for a monochromatic design with all white, black, or gray caps can both work wonders depending on your aesthetic.
- Thick Cardboard: This will serve as the solid base for your basket. You’ll need to cut out a circular or rectangular shape to act as the foundation of your creation.
- Hot Glue Gun and Glue Sticks: A hot glue gun is essential for securely attaching the plastic bottle caps to one another and to the base.
- A Temporary Plastic Basket: This will act as your mold to help you shape the basket as you build. You can use an old plastic basket that you no longer need.
- Scissors or a Craft Knife: These tools will help you cut the cardboard to the right shape and size for your project.
- Decorative Items (Optional): After completing your basket, you can further personalize it by adding paint, ribbons, or decorative paper.
Steps to Make Your Own Basket from Plastic Bottle Caps
Let’s walk through the steps to create your unique basket. It’s a fun and easy project that requires minimal materials and will leave you with a beautiful, practical item for your home.
1. Create the Base of Your Basket
- Begin by taking your thick cardboard and tracing the outline of the basket you are using as a mold. If you want a round basket, trace a circular shape. For a square or rectangular basket, just follow the appropriate shape.
- Once you’ve traced the shape, use scissors or a craft knife to carefully cut out the cardboard. This will serve as the sturdy base of your basket. Make sure the base is sturdy enough to hold the weight of the bottle caps.
2. Start Gluing the Caps in a Spiral Pattern
- Now, it’s time to start gluing the bottle caps. Begin by positioning your basket mold in the center of the cardboard base, then start placing the first row of caps in a tight spiral pattern, beginning at the center of your base.
- Take a plastic bottle cap, apply a dab of hot glue to its bottom, and press it firmly against the cardboard. Hold it in place for a few seconds to make sure the glue sets well.
- Continue adding bottle caps in a spiral pattern around the first one, ensuring each cap is tightly aligned with the others. The tighter the alignment, the more uniform and aesthetically pleasing your basket will look.
- Be sure to take your time with this step. The alignment of the caps is crucial for both the look and sturdiness of your basket.
3. Build the Walls of the Basket
- Once you have created a solid spiral base, it’s time to move on to the walls of the basket. To do this, place your plastic basket mold at the center of your spiral base. This mold will help you build the vertical structure of the basket.
- Begin gluing the bottle caps in vertical rows along the sides of the spiral. These rows will form the walls of your basket, gradually increasing in height as you move outward. Alternate between colors, or create geometric patterns as you glue each cap into place.
- Keep adding rows of caps until the walls reach the desired height for your basket. Be sure to press the caps securely into place, especially as you build higher.
4. Personalize and Finish Your Basket
- After the basket’s walls have been built, let the entire structure dry for a few hours. Once dry, carefully remove the temporary plastic basket mold. You should be left with a solid, sturdy basket made entirely of plastic bottle caps.
- If you want to add a little more flair to your basket, now’s the time to personalize it. You can paint the caps with a special design or add a layer of decorative paper around the edges. You could also glue colorful ribbons around the rim or along the handle for extra flair.
- If you’d like, you can line the inside of the basket with fabric to make it softer and more comfortable for storing delicate items. This can also help add a cozy, handmade touch to your creation.
Why Adopt This Idea?
- An Eco-Friendly Gesture: Each bottle cap reused avoids adding another plastic waste item to landfills or the environment. Recycling at home can make a big impact over time, especially when more people adopt sustainable practices.
- A Fun DIY Project: This is a creative and enjoyable project to try alone or with kids. It’s simple, accessible, and teaches valuable lessons about sustainability and creativity.
- Practical and Decorative: This basket is not only a great project but also a functional storage solution for small objects, craft supplies, toys, or any other items you might need to organize. Its unique appearance makes it an excellent conversation piece or a beautiful home decor item.
Conclusion: Give Your Plastic Bottle Caps a Second Life
Rather than tossing your plastic bottle caps in the trash, why not recycle them into something useful and beautiful? By creating a basket from these seemingly insignificant items, you’re making a positive impact on the environment while also engaging in a fun and creative project.
With minimal materials, a little patience, and some imagination, you can turn your pile of plastic caps into a lovely and functional basket. So, next time you find yourself with a collection of plastic bottle caps, don’t throw them away. Get creative, and see what wonderful things you can create!
Have you ever tried recycling your plastic bottle caps into something useful? If you have any tips or ideas, share them in the comments below! Let’s inspire each other to recycle and repurpose for a more sustainable future.

