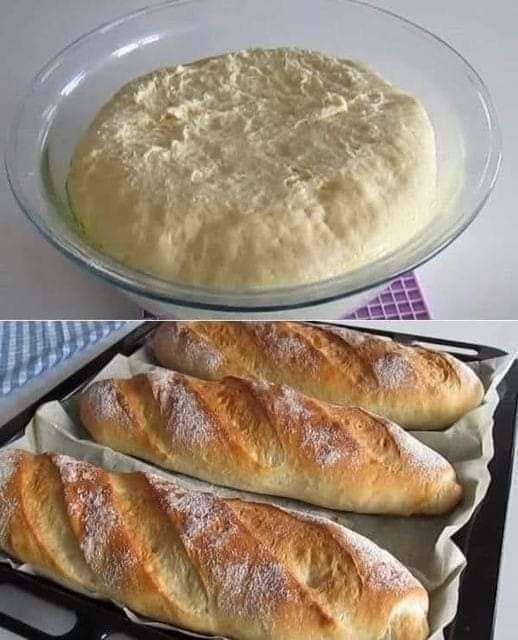
Baking your own bread is a rewarding experience. The scent of freshly baked bread wafting through your home is something that no store-bought loaf can replicate. This homemade bread recipe yields a soft, fluffy loaf with a slight crispy crust, making it perfect for any meal of the day. Whether you’re using it for sandwiches, toasts, or as an accompaniment to soups and stews, this bread will always impress.
This recipe is simple and requires only a few ingredients. It’s perfect for beginners and seasoned bakers alike. With just a little bit of patience and love, you’ll have a loaf of bread that tastes far better than anything you can buy in the store.
Ingredients
- 3 1/2 to 4 cups all-purpose flour (plus extra for kneading)
- 1 packet (2 1/4 teaspoons) active dry yeast
- 1 1/2 teaspoons salt
- 1 tablespoon sugar
- 1 1/4 cups warm water (110°F or 45°C)
- 2 tablespoons unsalted butter, softened
- Optional: 1 tablespoon honey or olive oil for added flavor and moisture
Directions
Preparing the Dough
1. Activate the Yeast: Begin by activating the yeast. In a small bowl, combine the warm water, sugar, and yeast. Stir gently to dissolve the sugar, then allow the mixture to sit for about 5 minutes. During this time, the yeast should become frothy and bubbly. If the mixture does not froth, it could be because the yeast is old, or the water temperature was incorrect. In such cases, it’s best to discard the mixture and start fresh with new yeast and properly warmed water.
2. Mix Dry Ingredients: While the yeast is activating, prepare the dry ingredients. In a large mixing bowl, whisk together the 3 1/2 cups of flour and the salt. Make sure the salt is evenly distributed through the flour to prevent it from coming into direct contact with the yeast, which could inhibit the yeast’s growth.
3. Combine Ingredients: Once the yeast mixture is frothy, make a well in the center of the dry ingredients. Pour the yeast mixture into the well, followed by the softened butter. You can also add honey or olive oil at this stage for extra flavor and moisture, if desired. Using a wooden spoon or your hands, stir the mixture together until the dough begins to form.
Kneading the Dough
4. Knead the Dough: Transfer the dough to a floured surface. Begin kneading the dough with your hands for about 5-7 minutes. The goal is to work the dough until it becomes smooth and elastic. Be sure to add a little flour at a time if the dough feels too sticky. Kneading is an essential step that helps develop the gluten, which is what gives the bread its texture and structure.
If the dough is too dry or crumbly, you can add a small amount of warm water to bring it together. The dough should be slightly tacky but not overly sticky. When done, the dough should bounce back when gently pressed.
First Rise
5. Prepare for Rising: Once the dough has been kneaded, shape it into a ball and place it in a lightly oiled large bowl. Cover the bowl with a damp cloth or plastic wrap to keep the dough from drying out. Allow the dough to rise in a warm, draft-free location for about 1 hour or until it has doubled in size. You can speed up this process by placing the bowl in a slightly warm oven (off) or near a warm radiator.
Shaping and Second Rise
6. Shape the Dough: Once the dough has risen, punch it down to release the air. Transfer it back onto a lightly floured surface and shape it into a loaf. If you’re using a loaf pan, grease the pan with a little butter or oil before placing the dough inside. Alternatively, you can shape the dough into a round loaf and place it on a parchment-lined baking sheet. The key is to make sure the dough is evenly shaped to ensure an even rise during baking.
7. Second Rise: Cover the shaped dough with a damp cloth or plastic wrap again, and let it rise for an additional 30 minutes. The dough should double in size once more. This second rise is crucial for achieving a light and airy texture in the bread.
Baking the Bread
8. Preheat the Oven: While the dough is rising, preheat your oven to 375°F (190°C). This temperature is ideal for a golden, crispy crust without over-baking the bread.
9. Bake: After the second rise, remove the cloth or plastic wrap and place the dough in the preheated oven. Bake for 25-30 minutes, or until the loaf is golden brown and sounds hollow when tapped on the bottom. The internal temperature should be around 190°F (88°C) for fully baked bread. You can use a thermometer to check this, or simply tap the bottom of the loaf. If it sounds hollow, it’s ready.
10. Cool: Once baked, remove the bread from the oven and allow it to cool in the pan for about 10 minutes. This resting time helps the bread finish cooking and makes it easier to remove from the pan. After 10 minutes, transfer the bread to a wire rack to cool completely before slicing. This cooling process ensures that the bread’s texture sets perfectly.
Tips for Success
1. Proper Kneading: Kneading is an essential step in bread-making. It’s crucial for developing the gluten structure that makes bread soft and chewy. Avoid overworking the dough, as this can lead to dense bread. The dough should feel smooth and elastic after kneading.
2. Rising Time: Rising time is crucial for fluffy bread. If your dough is rising slowly, make sure your yeast is fresh, and the environment is warm enough for the yeast to activate. If you find the dough isn’t rising, try placing it in a warmer location, such as an oven with the light on, to help it rise faster.
3. Flavor Enhancements: Feel free to experiment with adding different flavors to your bread. You can add fresh herbs like rosemary or thyme to the dough, or even mix in some grated cheese or olives for extra flavor. For a sweet version, you can add cinnamon and raisins for a twist on traditional bread.
4. Storage: Homemade bread is best enjoyed fresh but can be stored for up to 3 days at room temperature. Wrap it in a cloth or place it in a paper bag to help maintain its softness. For longer storage, you can freeze the bread. Slice it first, then wrap the slices tightly in plastic wrap or aluminum foil, and place them in a freezer bag. Frozen bread can be reheated in the oven for a freshly-baked taste.
5. Bread Machine: If you have a bread machine, you can use it for the mixing, kneading, and rising steps, making the process even easier. Just add the ingredients in the order recommended by your bread machine’s manufacturer and follow its instructions.
Conclusion
There’s something incredibly satisfying about making your own bread from scratch. It’s a simple recipe with basic ingredients, but the results are extraordinary. This homemade bread is soft and fluffy on the inside, with a crisp, golden crust on the outside. It’s perfect for sandwiches, toast, or just enjoying with butter and jam.
Whether you’re an experienced baker or just starting, this recipe is an excellent place to begin. It’s versatile, easy to follow, and yields consistently delicious results. Plus, there’s nothing like the joy of sharing a loaf of homemade bread with family and friends. The warmth of the kitchen, the smell of freshly baked bread, and the love that goes into making it will bring a sense of comfort and nostalgia to your kitchen.
So go ahead, give this recipe a try, and enjoy the simple pleasure of fresh, homemade bread!


