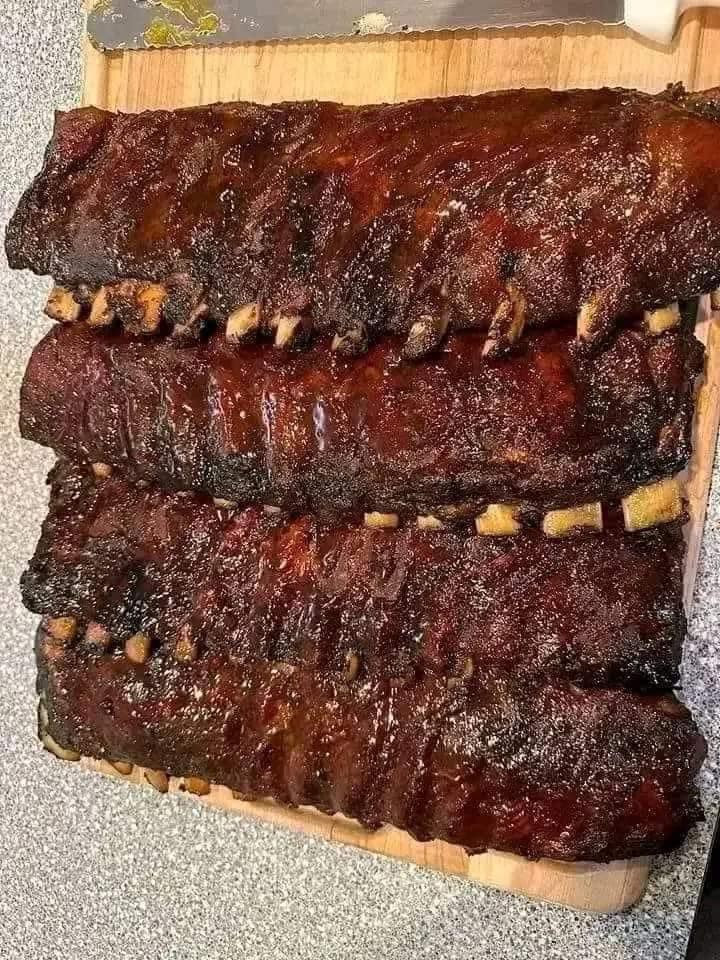
BBQ baby back ribs are a beloved dish for those who crave the perfect balance of smoky, sweet, and tangy flavors. When prepared right, they can easily become the star of any meal, whether it’s a casual family dinner or a festive gathering with friends. This recipe will guide you through creating perfectly tender and flavorful BBQ baby back ribs in your oven. Let’s dive into the ingredients, preparation steps, cooking techniques, and some tips and tricks to ensure that your ribs turn out succulent and delicious every single time.
Ingredients
For this recipe, you will need:
- ½ cup ancho chile powder: Ancho chiles are dried poblano peppers that bring a mild heat and a rich sweetness to the rub.
- ¼ cup white sugar: Regular granulated sugar helps to caramelize the ribs, creating a lovely crust.
- ¼ cup brown sugar: Brown sugar adds a deeper flavor due to the molasses content, enhancing the sweetness of the ribs.
- ¼ cup salt: Essential for seasoning and drawing out moisture to create a nice brine effect.
- 2 tablespoons freshly ground black pepper: A necessary spice for a bit of kick.
- 1 tablespoon ground cumin: This spice lends a warm, earthy flavor that complements BBQ well.
- 1 teaspoon dry mustard: It adds a subtle tanginess that balances the sweetness.
- 1 teaspoon ground cayenne pepper: For those who like it hot, cayenne brings a spicy punch.
- ½ teaspoon ground dried chipotle pepper: Chipotle adds a smoky flavor that is perfect for BBQ.
- 1 rack baby back pork ribs: The star of the dish. Look for well-trimmed ribs with a good amount of meat on them.
- 1 cup barbecue sauce: Use your favorite store-bought or homemade sauce for glazing the ribs.
Directions
Step 1: Preheat the Oven
Begin by preheating your oven to 250 degrees F (120 degrees C). This low and slow cooking process will ensure that the meat becomes tender and flavorful.
Step 2: Prepare the Dry Rub
In a small bowl, combine the ancho chile powder, white sugar, brown sugar, salt, black pepper, cumin, dry mustard, cayenne pepper, and chipotle pepper. Mix well until all the ingredients are evenly distributed. This dry rub is what will infuse your ribs with all those delicious flavors.
Step 3: Prepare the Ribs
Place the rack of ribs meat-side down on a large piece of aluminum foil. Using a sharp knife, prick the back of the rib rack several times. This step is essential as it allows the rub to penetrate the meat and helps render the fat during cooking.
Step 4: Apply the Rub
Generously apply the dry rub mixture to all sides of the rib rack. Make sure to massage the rub into the meat, ensuring that every inch is coated. The more rub you apply, the more flavor your ribs will have once cooked.
Step 5: Wrap the Ribs
With the rib rack meat-side down, carefully fold the aluminum foil around the ribs to create a tight seal. This method traps moisture and creates a steamy environment inside the foil, which is crucial for tender ribs. Once sealed, transfer the wrapped ribs to a sheet pan.
Step 6: Bake the Ribs
Place the sheet pan in your preheated oven and bake the ribs for about 2 hours. The low temperature and long cooking time will break down the connective tissues in the meat, making it incredibly tender. After 2 hours, remove the ribs from the oven and let them cool for about 15 minutes.
Step 7: Increase the Oven Temperature
After the ribs have cooled slightly, increase the oven temperature to 350 degrees F (175 degrees C). This higher temperature is essential for caramelizing the sugars in the barbecue sauce.
Step 8: Open the Foil
Carefully open the foil packet, taking care to avoid the hot steam that will escape. Drain and discard any accumulated juices and fat from the foil.
Step 9: Add the Barbecue Sauce
Brush a generous amount of barbecue sauce over the ribs, ensuring an even coating. If you’d like, you can also reserve some sauce to serve on the side when plating.
Step 10: Return to the Oven
Place the ribs back in the oven, uncovered, and bake for an additional 30 minutes. This step allows the sauce to caramelize and form a sticky glaze on the ribs. The high heat will intensify the flavors of the sauce, enhancing the overall taste.
Step 11: Let Rest and Serve
Once the ribs are done baking, remove them from the oven and let them rest for about 10 minutes. This resting period will help the juices redistribute throughout the meat, ensuring each bite is juicy and flavorful. After resting, slice the ribs between the bones and serve with extra barbecue sauce on the side.
Tips and Tricks for Perfect Ribs
- Choosing the Right Ribs: When selecting baby back ribs, look for those that are well-trimmed and have a good layer of meat on the bones. Baby back ribs tend to be more tender than spare ribs, making them a popular choice for BBQ.
- Marinating for Extra Flavor: If you have time, you can allow the ribs to marinate in the dry rub for several hours or overnight in the refrigerator. This extra time allows the flavors to penetrate even deeper into the meat.
- Using a Meat Thermometer: To ensure your ribs are perfectly cooked, consider using a meat thermometer. The internal temperature of the ribs should reach 190-203 degrees F (88-95 degrees C) for optimal tenderness.
- Finishing on the Grill: For an extra layer of flavor, you can finish the ribs on the grill after baking. Simply preheat your grill to medium heat and grill the ribs for a few minutes on each side, basting with barbecue sauce as they cook.
- Experimenting with Sauces: Feel free to experiment with different barbecue sauces. From tangy vinegar-based sauces to rich and sweet Kansas City styles, the right sauce can elevate your ribs even further.
- Serving Suggestions: These ribs pair wonderfully with classic sides such as coleslaw, cornbread, baked beans, and potato salad. For a lighter option, consider serving them with a fresh green salad.
- Storing Leftovers: If you have any ribs left over (which is often unlikely!), store them in an airtight container in the refrigerator for up to 3 days. Reheat them in the oven or microwave, adding a splash of barbecue sauce to keep them moist.
Conclusion
Baked BBQ baby back ribs are the ultimate comfort food that captivates with their rich flavors and tender texture. This straightforward recipe showcases how you can achieve restaurant-quality ribs right in your own kitchen. With a few simple ingredients and techniques, you’ll be able to create a mouthwatering dish that your family and friends will rave about.
Whether you’re hosting a summer BBQ or indulging in a cozy family dinner, these ribs are sure to impress. So gather your ingredients, get your oven going, and prepare to enjoy some of the best BBQ ribs you’ve ever made!
Stay tuned for more delicious recipes and tips on how to elevate your cooking skills. Enjoy your culinary journey and happy cooking!


